Are you excited about your new gas grill? You must have ended the daunting task of unboxing and assembling it. But, you might also be scratching your head on how to use a gas grill to have an exceptional BBQ experience.
Don’t worry; we’ll help you learn how to use a gas grill as a beginner through this ultimate guide. Read this guide to know the information needed to start the best way possible.
We’ll be helping you step by step. So, let’s get started with our 20 minutes read.
Note: This post includes affiliate links.
How to Use Gas Grill: The Pre Grilling Preparations
The grilling will not begin with ignition. Instead, here are the steps that you should follow before putting your recipe to cook on the grill. It’s the inevitable part of our guide on “how to use a gas grill as a beginner.’’
You can leave this part, save your time and invite more distress (you’ll never want). So, let’s begin.
1. Read the Gas Grill Manual
Your grill is unique; so is the manual. The manufacturers have put special care to help you understand your gear. Reading the manuals requires a lot of time.
Yet, they’re extremely helpful too. Therefore, put your grilling excitement aside, stop being in a hurry, and have a seat to read the manual that will guide you about safety tips and confusions that you might face during BBQing.
2. Keep Fire Safety in Mind

Do you know, on average, the US fire department responds to about 358,500 residential fires per year? It’s why you need twin gear with your gas grill as a fire extinguisher (the dry powder fire extinguisher can make a better choice for BBQing). Along with this, make sure that you also follow these fire safety tips with your grill:
- Check that the uncovered area of the grill is clear of liquid substances and inspect the grill grease collector tray.
- The company recommends removing a stuffed plastic tray to avoid an ash fire. Plan the barbecuing outdoors by placing the grill at least 10 feet away from the main indoor entrance.
- Make sure you also have a water spray bottle and sand to fight the minor flare-up, which is pretty common with grilling and doesn’t really require a fire extinguisher.
- Never try to use a gas grill indoors, no matter how good ventilation you have.
By following these grilling tips, you can be confident that you’re heading towards a safer grilling.
3. Get the Best Tools and Essentials for Grilling with Gas.
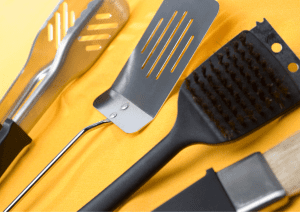
Before starting with cooking the food, arrange your tools. You’ll need the best tools here. The good news is, many of these tools are already available in your kitchen.
Yet, here is the list of what tools you’ll need and why. You can also get the missing tools by following the links.
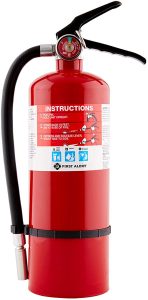
You’ll need a lifesaver in your BBQ zone to fight an unseen fire. What else can help except an excellent quality fire extinguisher? So, make sure you have got a responsive guard handy.
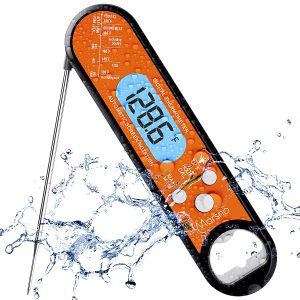
Saying, “you can’t grill without a digital probe thermometer,” can be right. A meat thermometer helps you get properly cooked food from your grill. Whether or not your grill has a thermometer, keep one to check the meat temperature.
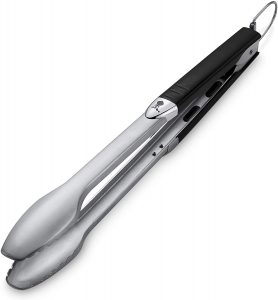
You can’t flip or toss your burgers, chicken, or meat on the grill with your hand. In such a case, long tongs of nearly 16 inches can make an excellent choice. You can look forward to getting one if you don’t have one yet.
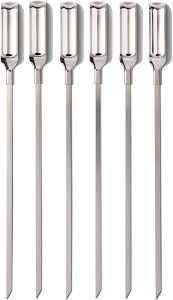
You might love BBQ shrimps and veggies. If it’s so, having skewers can add plenty of joy to your gas grilling.
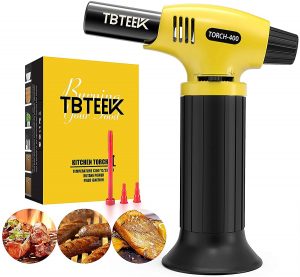
Butane torches are necessary for outdoor grilling. They can help with searing and lighting your smoker tubes as well. You can check out the best butane torch here.
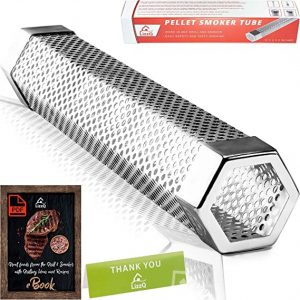
Wood pellet smoker tube can change your first BBq into a “wow” if you know how to use a smoker tube. So, by having the best wood pellet smoker tube, you can uplevel your grilling. Besides this, you can also search for the best wood pellet smoker tube here.
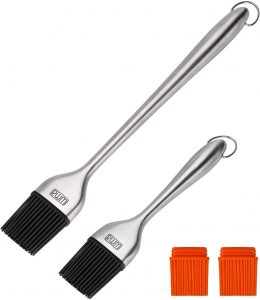
For an airy BBQ, grease your grill with the first step when you’re about to place the meat on your grill grates. Here, you’ll need a brush. Therefore, you should have an oiling brush to season the grill properly.
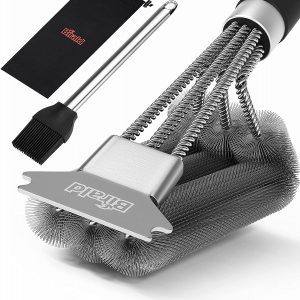
When you’ve finished BBQ, store your grill after properly cleaning it will be the last step. At that point, how can you skip cleaning the grill with a brush? So, have one that is going to last.
Have Additional Tools
In the same way, some additional tools can be:
- Knife
- Kitchen towel
- High heat cooking oil for seasoning with a spray can
4. Have Plenty of Fuel
Has anyone ever run out to get hot when grilling? And worse: we had some hungry guests at dinner. Therefore, keep additional gasoline on hand and never be worried about running out of fuel. It’s really difficult to leave when the grill uses a rechargeable gas tank to fuel it during cooking.
5. Clean the Gas Grill
Clean every surface of your grill before every use, but let it dry out after cooking. It’ll also create a safety coating between each grilling session. To clean before cooking:
- First, heat your grill for 15 minutes on medium heat while the lid is shut until all the smoke is gone.
- Brush off the chopping block in your grill and dip it in freshwater to prevent food particles.
- Scrape the grill’s grill brush with water to prevent airborne food particles from the food particulate.
Your gas grill is ready for BBQ.
6. Connect the Grill to your Home Gas Line or Gas Tank
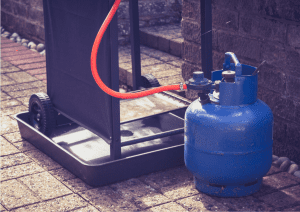
Now your grill’s connectivity with the gas supply begins. Most grills use small propane tanks. Yet, some large grills need to access the natural gas supply to your home. You have to take care of the following points in this regard.
- Choose the Gas Connection Type.
You’ve to choose your gas connection type from these two sources:
- A Propane tank can generally be a starting point for newcomers or infrequent grillers. Some claim it burns cleaner, but it does not burn hot.
- In contrast, natural gas can be best if you’re using an outdoor kitchen and frequently grill your food.
Most hardware and groceries have the propane tank on their premises. The use of natural gas in grills is also growing in prominence over the last ten years.
Some grill manufacturers sell kits, while some (like Weber) don’t allow to convert propane tanks or natural gas. It’s important to decide ahead of time which one fits your needs as a conversion might not invalidate the warranty.
-
Do a Gas Leakage Test
After completing the second step, it’s necessary to check the supply line for leaks. Examining it visually can work sometimes. Yet, the fittest solution is to detect leakage is using a leakage test.
To do a leak test:
- Fill a spray bottle with water and dishwashing liquid.
- Mix equal parts dish soap or liquid and cool water. And spray it on the gas supply line.
- If you observe bubbles, even if they’re tiny, take a look and just shut it down right away.
- You can easily prepare the connection by applying a pressure test or a combination of the. Do not be afraid to close the valve immediately and remove the grill.
Never use a match if there’s a leak. When you find a leak, you will have to check out the valve and regulator before you begin grilling. If any leak occurs, it is a sure sign that the grill is ready for use.
How to Use a Gas Grill: Start the Gas Grill
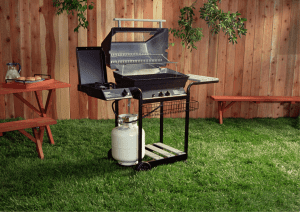
Once done with the basic checks, now it’ll be the time to light the gas grill. To start the gas grill, you can follow these steps.
1. Place the Gas Grill in a Safer Area
Placement of the grill correctly and safely is the initial step one should take. It should be placed at least 10-15 feet away from the house or any other structure or construction.
2. Open the Grill’s Lid
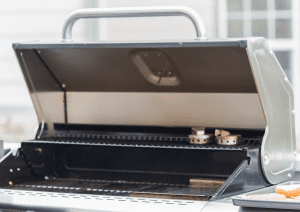
We need to tell you separately that you must open the lid before lighting the grill to get rid of the gas build-up. WHY?
Don’t be in a hurry. Just keep it open for 15 minutes. No matter how often you grill, it’s inevitable to prevent an unwelcome fire blast on your grill that build-up gas can cause if ignited immediately.
3. Ignite the Gas Grill
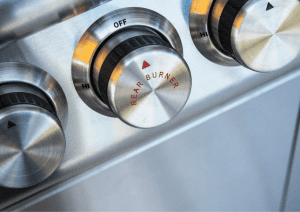
Now you can ignite your grill to start barbecuing the meat and vegetables. To ignite the gas grill, follow these steps.
- Open the gas supply valve and turn the regulator knob on from the control panel.
- If your grill has a push-button electric ignition system, simply press the button. Once the first burner is lit, continue turning on as many other burners as you’d like to use.
- You can turn on the burner buttons without pressing the ignition button again and again.
- Some grills don’t come with an auto-ignition system, you need to light it manually. Therefore, To help with manual ignition, the gas grills come with a matchstick holding wand. You can use it to light your grill. You can also know more about “how to start a gas grill” here.
4. Season your Gas Grill
Before using your grill for the first time, spray the grates evenly with a high-heat cooking spray like canola oil while the grates are cold. Afterward, turn the grill to medium heat for about 15 minutes until the oil burns off or starts to smoke.
5. Get it Hot through Preheating.
Preheating your grill is important and not doing so is a common mistake. Preheating your grill lets the grill warm up. Gas grills have a built-in thermometer in the lid to tell you the internal temperature; close the lid and allow the grill to heat up.
Then, what’s the advised time to preheat the grill before beginning any cooking? A good rule of thumb would be 30 minutes. Yet, you should do preheating for at least 10 to15 minutes.
After warming up for 10-15 minutes, you can reduce the grill’s temperature or turn off the flame. You can simply combine preheating and seasoning steps to save your time: season the grill and leave it for preheating.
How to Use a Gas Grill: Tips for Grilling Food for the First Time
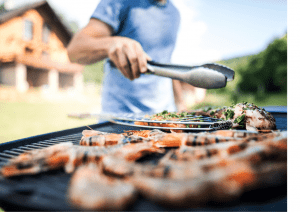
After igniting the grill, the cooking will begin. Here are the BBQ expert tips that can help you have an airy grilling along with upgrading your BBQ skills. Let’s continue to learn more about how to use a gas grill.
1. Know your Grilling Zones
Zone cooking is a grilling methodology that partners direct and indirect cooking for maximal efficiency. By knowing the heat or grilling zones, you can use your gas grill with mastery.
2. Use That Weird Small Top Rack and Lid
What’s the main difference between a grill being shut open and being open? Covering the grill while cooking allows the grill to heat up with indirect heat. It’s a really handy technique when grilling multiple meals, particularly dense cuts of meat.
In contrast, locking the lid can likewise turn the BBQ gear into a convection oven. So, you can do more cooking with it.
Remember that you can do best with the storage compartment behind the lid and the secondary shelf from our grilling tips. It’s the perfect place to melt the cheese on a chicken sandwich or warm buns on grilled chicken.
3. Prepare Food Before Grilling
It’s worth having your meat and vegetable pre-prepared before putting on the grill. Yet, when to prepare them?
Have you completely read the previous sections of this article? You can understand that properly establishing the grill for delicious BBQ will require at least an effort of 2-3 hours. So, make sure that you’ve prepared your recipe before preheating the grill: once when you’ve sensed that your grilling station is ready for a launch.
4. Cook at the Correct Temperature
Your cooking on a gas grill depends on the temperature that is suitable for the particular meat type. For instance, a thin-cut lamb or beef should be grilled hot and fast (even in burger form.) More delicate items including, beef and poultry, are grilled at moderate temperatures on your grill grates. Hence, to get the best out of your grill, you’ll need to follow the proper temperature guidelines as your recipe tells or your product manual guide advises.
5. Use a Meat Thermometer
To make a perfect BBQ, a digital thermometer is required in grilling. Place it in the thickest part of meat by about 1/4 to 1/4 inch, avoiding bones or fat pockets. I’ll indicate the internal temperature of your steak.
If you don’t have any, you can get the experts recommended Marsno digital meat thermometer.
6. Follow Food Safety Measures during BBQ
Food safety is essential, you’ll agree. Follow these grilling tips to enjoy healthy food ultimately:
- Use different plates to bring on raw meat and to serve the grilled meat.
- Cook protein foods up to a safe temperature and examine the uses of a meat thermometer to check for temperature.
- Keep your cooking surface clean and sanitized to prevent cross-contaminations.
- Learn food safety and practice it.
7. Watch your Grill
Just overlook your food for a moment; you’ll get burned meat. Little negligence can ruin your entire BBQ adventure. So, make the right preparations for the food, and cook food at medium heat. Shift your grilled food to the cooler place or the grilling rack to avoid letting it burn out too quickly.
8. Learn the Secrets of Searing
You can get a restaurant like BBq flavor at home by learning the searing secrets of great grilled flavor. While it does not lock in juices, it caramelizes the edges of meats, creating a delicious surface. This process is possible with almost any cut of beef, lamb, or pork.
9. Choose Between Direct Heat and Indirect Heat
Grilling also involves two types of heat: direct heat and indirect. Direct heat is great for grilling foods quickly, cooking burgers, and grilling shellfish. In addition, the direct heat also helps with grilling veggies quickly and searing meat.
In contrast, indirect heat means that you place the food away from the burner and close the lid to let your food cook. It’s best if your meals require cooking slowly.
On gas grills, the indirect heat is suitable for foods that will take over 20 minutes, like whole chicken and large pieces of meat for your family. To cook on indirect heat, you place your meat on an off burner, near the burner that is on. It lets the food receive slow heat to cook thoroughly while keeping the lid locked like an oven.
10. Learn about Smoking on a Gas Grill
Gas grills aren’t meant for smoking meat, but you can get grilling with excellent outcomes. It adds a very rich smell to wood chips and pellets. For this purpose, you can use some techniques and tools as well.
For instance, using a smoker box or wood pellet tube smoker can help you get that epic aroma in your food for your family and friends. You can also learn how to use wood pellets on a gas grill to add this mesmerizing smoke to your BBQ.
11. Turn off the Gas Grill
When the grilling session is over, the time is to turn off the gas grill. So, close the valve on the tank and turn clockwise to make it stop, and close the lid. When your gas grill is fully cooled, cover it with a sealed cover. In addition, turn off the burners and take care of the grill grate.
Store your grill in a separate place, preventing rain and keeping it off direct sunlight. Cleaning the grill follows the correct precaution measures to increase your grill life and prepare it for use again.
12. Keep Your Grill Clean
When you regularly clean the grill, it can decrease the chance of flare-ups and constant smoking. Remove the grill grates and the burner covers if required and clean the grill. The brush in the barbecue removes stuck food that gets caught inside the grill and in the grill grates.
After deep cleaning, you will notice an immediate impact on how the grill performs. Therefore, scrub the grill completely until the end of the year for retail usage.
13. Control Flare-Ups
Flared-ups are common to grills. Yet, they must be controlled and not fought. Always keep a portion of your grill occupied to prevent cooking for another occasion. If you see flare-ups do this:
- In case, the fire spreads, remove the food from the grill and let the fire burn off the grease as quickly as possible.
- If your fire is coming out of control, remove all the foods and shut the burner down. Later, turn off the gas valve.
- Leave the grill door open and let the fire burn all by itself. Leave your grill in place and let it cool down.
- Once the fire is over, thoroughly clean your grill.
FAQs about Using the Gas Grill
How do you store propane tanks?
For safety, propane tanks must always be located outside. That would have been unconstitutional if your propane tank was locked in a garage or stored in storage.
You can maintain the propane battery connected to the grill, but it’s always best to close the valve after gas grilling. In case, you don’t plan on using the grill for too long, disconnect the battery. If no one wants to keep it for long, disable it.
Can gas grills explode?
In general, propane gas grills are safer. Yet, if the fumes have been built up in the grill because, by mistake, you left some knobs on and lighted the grill without keeping the lid open for 15 mins, it can result in an explosion. Still, it can be because of your mistake, not the grill itself.
Can you leave the propane tank attached to the grill?
Yes, you can leave the propane attached. Yet, make sure that the valves are completely off.
How do you turn off the propane tank after grilling?
It’s easy. Turn the burner’s knobs off. Then, Close the propane tank valve through clockwise rotation.
Final Thoughts on How to Use a Gas Grill as a Beginner
If you have been wondering how to use a gas grill, it’s not hard. It’s a great deal of excitement to get your favorite grill at home. Yet, by practicing the gas grilling tips and techniques properly, you can enjoy a peaceful grilling not only for the first time but over the years.
universitygrill.net is a participant in the Amazon Associate program and will earn from qualifying purchases.
